Simulating Observations in CASA v3.0.1: Difference between revisions
| Line 15: | Line 15: | ||
the links below describe the various sections of inputs | the links below describe the various sections of inputs | ||
2. [ | 2. [[Input Model]] - Preparing a patch of sky for <tt>simdata</tt> to pseudoobserve. [https://safe.nrao.edu/wiki/bin/view/ALMA/InputExamples Sample Model Images] | ||
3. [[Antenna List]] - how to specify the positions and diameters of your antennas or stations. | 3. [[Antenna List]] - how to specify the positions and diameters of your antennas or stations. | ||
| Line 24: | Line 24: | ||
6. [[Deconvolve Image]] (Optional) Go back from the calculated visibilities to a synthesis image | 6. [[Deconvolve Image]] (Optional) Go back from the calculated visibilities to a synthesis image | ||
Revision as of 16:04, 3 December 2009
This Page Under Construction
simdata is under active development, documentation may lag reality, please email rindebet at nrao.edu with any questions - It's my job to help you use this software
Steps to simulation
pdf presentation explaining the same things as below
1. Install CASA
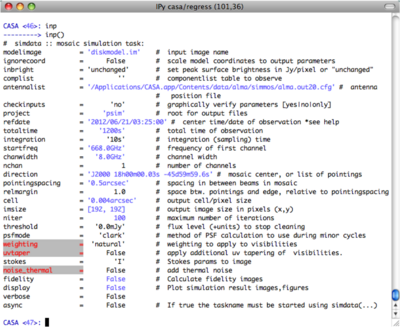
simdata inputs look like this:
the links below describe the various sections of inputs
2. Input Model - Preparing a patch of sky for simdata to pseudoobserve. Sample Model Images
3. Antenna List - how to specify the positions and diameters of your antennas or stations.
4. Specifying Observation - how to set up what/when/how you want to observe, and the output image details
5. Corrupting Observation - (Optional) For added realism, corrupt your visibilities with thermal and phase noise.
6. Deconvolve Image (Optional) Go back from the calculated visibilities to a synthesis image
