NGC 5921: red-shifted HI emission 5.7.2: Difference between revisions
| Line 108: | Line 108: | ||
The output goes to the logger window; see the screenshot at right. | The output goes to the logger window; see the screenshot at right. | ||
<div style="background-color:#aaaaaa;> | <<div style="background-color: #aaaaaa;"> | ||
'''Tip:''' You can control the text size of the logger window using <ctrl>-A (smaller font) and <ctrl>-L (larger font). | '''Tip:''' You can control the text size of the logger window using <ctrl>-A (smaller font) and <ctrl>-L (larger font). | ||
</div> | </div> | ||
Revision as of 12:22, 3 December 2009
Overview
The technique used to calibrate and image continuum datasets generally applies to spectral line observations, except that an additional calibration step is required. Bandpass calibration flattens the spectral response of the observations, ensuring that spectral channel images are properly calibrated in amplitude and phase.
The following tutorial derives from an annotated script provided in the CASA Cookbook. The script is largely reproduced in sections and additionally annotated with figures and illustrations.
The data are included with the CASA installation.
Setting up the CASA Environment
Start up CASA in the directory you want to use.
# in bash
mkdir NGC5921
cd NGC5921
casapy
Now, in CASA, set up paths and global variables to facilitate the data reduction. These operations can be performed on-the-fly if you are reducing data interactively, but it's better to get them out of the way in the scripting environment.
import os
scriptmode = True

prefix = 'ngc5921.demo' # The prefix to use for all output files
# Set up some useful variables (these will be altered later on)
msfile = prefix + '.ms'
btable = prefix + '.bcal'
gtable = prefix + '.gcal'
ftable = prefix + '.fluxscale'
splitms = prefix + '.src.split.ms'
imname = prefix + '.cleanimg'
We'll use a python os command to get the appropriate CASA path for your installation. The use of os.environ.get is explained in the Appendix.
pathname=os.environ.get('CASAPATH').split()[0]
fitsdata=pathname+'/data/demo/NGC5921.fits'
Scripts are of course modified and repeated to the satisfaction of observer. To help clean up the bookkeeping and further avoid issues of write privileges, remove prior versions of the measurement set and calibration tables.
Tip: The first command in the following code block removes the measurement set. Depending on the size of the source data, refilling a measurement set can be time-consuming, and so you may want to consider editing a separate script that preserves the measurement set but skips the importuvfits command given below. This particular dataset is not very large and so refilling is fairly quick.
rmtables(msfile)
rmtables(btable)
rmtables(gtable)
rmtables(ftable)
rmtables(ftable)
rmtables(splitms+'*')
rmtables(imname+'.*')
rmtables(prefix+'.moments*')

# Final clean up of auxiliary files
os.system('rm -rf '+prefix+'*')
Import the Data
The next step is to import the multisource UVFITS data to a CASA measurement set via the importuvfits filler.
# Safest to start from task defaults
default('importuvfits')

# Set up the MS filename and save as new global variable
msfile = prefix + '.ms'

# Use task importuvfits
fitsfile = fitsdata
vis = msfile

saveinputs('importuvfits',prefix+'.importuvfits.saved')

importuvfits()
Saveinputs saves the parameters of a given command to specified text file, handy to debug a script and see what actually was run. Here, the parameters of importuvfits are saved to the file "ngc5921.demo.importuvfits.saved". Here's a listing of this file. Notice that it is executable with execfile in CASA (remove the # commenting symbol before importuvfits to have the execfile run the command).
CASA <71>: os.system('cat ngc5921.demo.importuvfits.saved')
taskname           = "importuvfits"
fitsfile           =  "/usr/lib64/casapy/30.0.9709test-001/data/demo/NGC5921.fits"
vis                =  "ngc5921.demo.ms"
antnamescheme      =  "old"
#importuvfits(fitsfile="/usr/lib64/casapy/30.0.9709test-001/data/demo/NGC5921.fits",vis="ngc5921.demo.ms",antnamescheme="old")
A Summary of the Data
We'll need to have a look at the observing tables to learn the calibrator and source names. The relevant command is listobs.

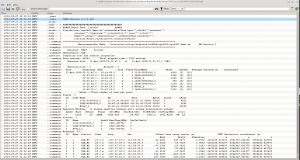
listobs(vis='ngc5921.demo.ms', verbose=True)
The output goes to the logger window; see the screenshot at right.
<
Tip: You can control the text size of the logger window using <ctrl>-A (smaller font) and <ctrl>-L (larger font).
Appendix: Python Notes
os.environ.get
It's worth having a look at the output of the os.environ.get command to understand the python syntax. You can think of os.environ as a list of operating system environment variables, and get is a method that extracts information about the requested environment variable, here, CASAPATH. Get returns a string of whitespace separated information, and .split() turns that string into a list. The array index [0] extracts the first element of that list, which contains the path.
To illustrate, here is some example python I/O in CASA.
CASA <12>: print os.environ.get('CASAPATH')
/usr/lib64/casapy/30.0.9709test-001 linux local el5bld64b

CASA <13>: print os.environ.get('CASAPATH').split()
['/usr/lib64/casapy/30.0.9709test-001', 'linux', 'local', 'el5bld64b']

CASA <14>: print os.environ.get('CASAPATH').split()[0]
/usr/lib64/casapy/30.0.9709test-001